Here is a public
service announcement from the textiles team. Wimpole Wrapped has come to… well
Wimpole and us here at team textiles want to extend this theme through to the
New Year and donate a scrap of Tyvek for every curtain we personally wrap.
Thank you for listening/reading.
That either put a
smile on your face or wondered if I’ve hit the eggnog a bit too early! This is
actually a joint collaboration between my blog and the relatively new
conservation blog now set up at Wimpole. Of course as you know when I say joint
collaboration I mean of course that I wrote both of them for the two blogs!

For the quick
version and probably repeated text feel free to hop over to the conservation
blog and to check out what else is occurring in the world of Wimpole follow the
link supplied (http://wimpoleestatent.wordpress.com).
I also realise upon reading through this post that there may be a bit of
repetition from previous posts so I apologise in advance.

Anyway,
on with the show so to speak. This week it was just Mary and I doing the
textiles as Maggie had been taken ill.
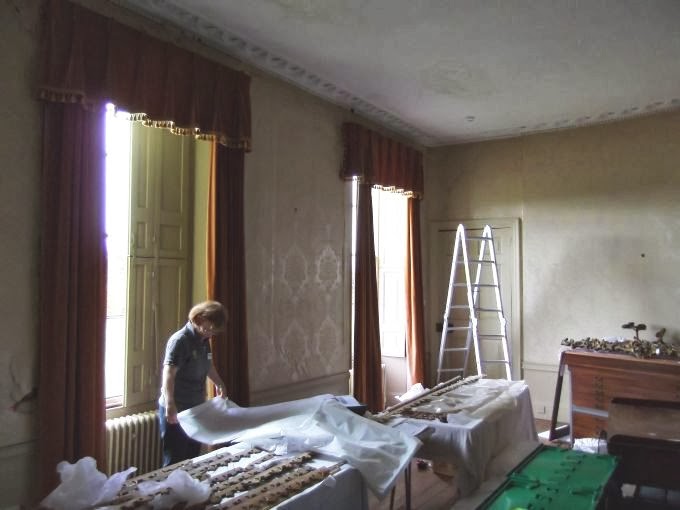
First off were
the lovely curtains in the Yellow Drawing Room as seen here (left). Although we
were bagging these we had to do it slightly differently due to quality and type
of material involved.
The task here
was to create quite tall Tyvek bags to fully protect the curtains. When the
bags were in place they extended from my head height (that’s a dizzy 6 foot 2
inches, and yes it does get cold up here!) reaching down to the floor.
But let’s not
get ahead of ourselves. So you think bagging a curtain sounds easy? Put it this
way, I was glad Mary was able to help me as it’s definitely a two person job!
Something I came to realise that afternoon when I was making more bags on my
own!
Here’s a
different explanation to how we create the Tyvek bags (and also to save on
double typing!).
Simply put (or as
simple as I can make it) we cut a length of Tyvek and fold it in half. When the
bag is in place the curtain sits in this fold with the rest of the Tyvek
running up the back and front of the curtain. In between the folds of the
curtain we place acid-free tissue sausages to pad out the folds to prevent
possible creasing of the material.

See I
wasn’t kidding when I wrote about sausages! Look at those little bangers!! From
tissue paper (top) to sausages (bottom). By the way, see that carpet
underneath? You’ll probably be seeing more of that in a future post!
With the sausages in place
the two ends of the bag are then folded round and tucked into each other to
fully enclose the curtain. A specially created drawstring at the top of the bag
is pulled tight (but not too tight) to secure it in place.

Here’s
another photo of the bag creation process and also to give you a bit more of an
insight into how long this all takes!
As you can see
the ‘specially created drawstring’ is a very cleverly tied piece of thin Tyvek.
Or if you prefer, Tyvek strip. Oh and just so you know the whole “Tyvek doesn’t
rip or tear” is a load of rubbish! There should be a caveat that includes
tearing if strip is too thin. The number of times I was struggling to tie to
ends together and have the damn thing rip on me!
The folded over edge
is temporary as this is lets us cut slots in the Tyvek that has the drawstring
running through it. I had already cut the slots in the photo though I admit it
is difficult to see them. Maybe I should have sprayed them red or something to
make them stand out!

Boom.
So there you go, I think that just about covers home-made Tyvek bags. I promise
no more explanations, well not of the bags anyway. Look forward to next post
with my ten part explanation of paper clips and their many uses!
As you can see
the curtains in the Yellow Drawing room are nicely bagged up and ready for the
works. Come back soon and no doubt I’ll have a post on us taking everything
down again!
With the Hall
being wrapped up for Christmas this year it’s been a bit too and fro with the
materials. I had to borrow the only remaining roll of Tyvek from the lovely
volunteers wrapping all manner of things ready for the next two weekends!
So a big thank
you goes to the ladies for keeping me out of mischief and managing to carry on
with the curtains!
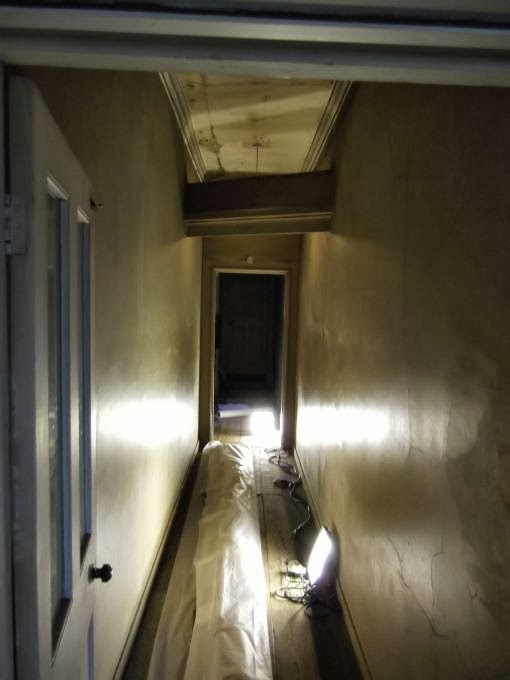
Unfortunately
Mary was preoccupied with other jobs in the afternoon so I pushed on by myself. Moving clockwise from
the entrance hall, which had already been spruced up by the house staff,
eventually found me in the Long Gallery (I think! If I’m wrong you’re welcome
to correct me).
One
thing that was noticeable bagging the curtains that afternoon was the effect of
light damage on the curtain material as seen in the photo below. I know that
Julia is working on a side project to monitor the light levels in each room to
see how it affects materials.

It
may be difficult to see from the picture but there is a stark contrast between
the lighter fabric on the edge to the true red of the material itself.
Hopefully the results of the light survey will highlight the problems of light
in a grand Hall like Wimpole.

Finally as a
throw back to Halloween, I’ve encountered an anomaly in one of my photos that I
took while in the Long Gallery. Now I’m not saying I’ve captured a ghost on
film because I’m always sceptical of that sort of thing (though I am open
minded to all possibilities), but on the other hand it’s not something that I
can readily explain.
First glance and
there’s nothing glaringly obvious, it appears to be an empty room. The odd
thing I noticed was the odd shape on the left of the photo. I don’t remember
anything in the room that would create that sort of image, plus bear in mind
it’s approximately in the middle of the room.
I should also
point out that I took the shot into a mirror so the image is also a reverse of
the actual Long Gallery. I have fiddled with the contrast and brightness levels to bring out the picture (it was originally black with just the white of the column) but either than that no other enhancements.
I suppose that’s what I get for trying to be arty!
Ghostbusters eat your heart out!! Seriously though, any suggestions of a
mundane explanation would be welcome.
And on that spooky
note, until next time…