Friday, 23 May 2014

Singapore Sling

This is a blog post with a difference as this is coming to you live from sunny Singapore! Yes, so as not to disappoint you loyal readers I've taken the blog abroad and thought I'd give you an Asian flavour for a change. Obviously with a forestry theme in mind of course!

Unfortunately I'm struggling with my memory on my tablet so I'll have to do it proper when I get back.

For something quick though how about a new idea that I saw walking through the park just this afternoon...


Turn your fallen tree into a mature garden display! May not be ideal in the parkland but how about in the gardens?

If anyone's interested on a Traveller's Tale visit my other blog for further eccentricity, here:

http://nstraveljourn.blogspot.co.UK


See you there!!


Monday, 21 April 2014

Skeletons in the Closet - Osteology? That’s Bones and Stuff Init? (2)

Bonjour all and sorry for the delay in posting part two of the Osteology blogs. It’s been over a month since the last post I’ve actually completely forgotten how I was going to continue this so I’ll have to mudge through it and hopefully come up with some kind of coherent article.

FYI I have the Blues Brothers soundtrack in the background as I write this for all you talented musical viewers out there. Heck, I don’t even know if anyone gives a hoot what I listen to but I’m gonna tell you anyways!
Anyhoo, I digress… Actually I find myself writing that quite a bit so I think I might coin that as my catchphrase for the blog. I guess that’s what happens when I write off at a tangent. Hmmm, now where was I?

Hang on a minute… brb…

We'll be back to our feature presentation momentarily...
Right, on with the show so to speak…

First off, the mystery bone. You didn’t think it was going to be easy did you? I was contemplating stringing this out until I get at least one comment or guess but to be honest I’ll probably forget by the time I write the next post.
For those newbies who may be jumping in at this post here’s a reminder:

So this was the bone (left) that I asked people to see if they knew what animal this was…oh and a bonus point if they knew the bone too!

The animal in question is actually a Shrew; or common shrew to be precise. To be ultra-precise here’s the latin name too:  Sorex araneus. Unfortunately I don’t have a scale (should have thought of that when I took the photo) but the entire length of the bone is about the same size as your thumbnail. Pretty small, huh?
Incidentally the bone in question is the mandible or jawbone. I know it’s probably obvious but for those who weren’t sure there you go. If you’ve skipped the previous post so you could get the answer; shame on you and don’t cheat next time!!

Moving on, as mentioned previously I’ll write a little bit about my latest bone report to give you an idea of what’s involved and what I look at; aside from a big box of bones!

Usually the bones are separated out into their individual contexts; a context being a distinct layer within a particular feature (i.e. post-hole, ditch etc). The context can also be relating to a trench, like in this case.

Like the photo to the right, each context has a number of animal bones associated with it. However bear in mind that not all contexts have bones in them, which I usually make a note of too. Noting what’s there is just as important as what’s not there!

To start with once I’ve emptied the bones out into a cleanable surface I tend to group them according to species or at the very least a general group (e.g. small mammal or bird bones). As you can see I’ve already begun to separate this context out, with large mammals on the right hand side.

Now that we have them roughly grouped as in the photo to the left, the next step is to identify the individual elements (or bones) just for simplicity more than anything else.

There’s nothing worse than starting to input the data and finding near the end that you have an extra sheep metacarpal and you have to go back waste time editing a previous entry! It probably doesn’t sound too bad but if you have to keep re-editing entries it can get very tiresome!!

Often I’ll have a little pile of unidentified bones too. These can be anything from long bone fragments to tiny splinters and other things that you just can’t identify because of the size and type of fragment.
Sure you could sit there for hours wading through the reference material and identifying every last bone fragment but it just isn’t practical within the time limits. Depending on how badly fragmented the contexts are I’m happy if the unidentified material ends up at about 10% of the total assemblage.

After that it’s just a simple matter (hahaha! Simple indeed, I make it sound sooooo easy!!) of inputting the various pieces of information into the database. Data such as species, element and context are fairly obvious but also things like butchery evidence and other environmental data are also considered.
Depending on what the person who’s asked me to do the report wants I can be as detailed or as basic as it needs to be. For example the basic information for the bone on the right would be: sheep scapula (shoulder blade), along with context data and no obvious signs of butchery. A more detailed analysis would include the side of the body (left hand side), bone completeness (about three-quarters whole) and probably environmental factors.

Once all the data has been put into the database, which may take several days depending on the size of the assemblage, I summarise the information and look for any patterns or anything of interest. Patterns could be anything that stands out, for example if a particular context contains lots of pig humerii or an unusual species… say if there was a zebra bone in the sample or something. Not that I actually know what a zebra looks like, not without a hell of a lot of research anyway!

What's Up Doc?
No the above bone isn’t a zebra bone just in case you thought it was! It’s just a random photo I threw in at the end. In fact it’s a……

Continuing the musical note (boom, boom) the final song was Back in Black by AC/DC! Not Blues Brothers I know but still a movie, guess which one!!

Until next time

Monday, 10 March 2014

Skeletons in the Closet - So You Want to Be an Osteoarchaeologist? (1)


Greetings all, after a long break I’m back blogging! Unless of course you caught the preview from last week, then you can skip this first paragraph.
Actually I thought I’d take a break today and fill you in on what I’ve been up to that’s taken me away from here for a while. In case you’re wondering, I really do have skeletons in my closet! True they’re not actual fully articulated ones but a collection of bagged bones, but nevertheless they currently sit at the bottom of my wardrobe.
So just for starters here’s a little mystery bone; see if you can guess the bone and what animal it’s from…

It's a mystery...
In case you’re thinking of cheating and scrolling down to find the answer, I won’t be posting it here. I’ll save it until the next post! Unless of course you stumble on this blog years from now, in which case you would already have it. Obviously.

Moving on, every now and then I get tasked to analyse the osteological remains from archaeological sites to help add to the overall understanding of the area. If I’ve lost you already, basically I look at them ol’ bones! Most of this work comes from CAFG (Cambridge Archaeological Field Group - http://www.cafg.net/) and the latest was a couple of boxes that revealed some interesting finds.

More on that next time though. Yes it’s going to be another two-part blog post having just decided to stretch it out a bit. Might be a bit of a squeeze to fit it all into one post and I like to keep them fairly short so you faithful readers aren’t falling asleep by the time you get to the bottom!
So what will I ramble on about now? Brambles?? Actually, no, I just thought it rhymed well… or maybe a future post perhaps! Anyways, as usual, I digress.

Instead how about a little intro into the wonderful world of osteoarchaeology; where things aren’t as simple as they seem when it comes to species identification.

Baa baa black sheep...
Rule number one: When is a goat not a goat? When it’s a sheep! Goats and sheep are difficult to identify when looking at just their bones as there are only a few indicators in their skeletons to separate them apart. Since rarely do you get pristine skeletons of animals handed to you then you can imagine how hard it could be with just a bag full of bones.

These on the left are of course sheep... erm, not quite sure what species. Black ones I guess, which reminds me of the old nursery rhyme 'baa baa black sheep'. No it's not racism like most people think but rather that black wool was a more valuable commodity than white wool during Medieval times, hence the line "have you got any wool"...

Stylised skull (cos I didn't have a real one!)
Rule number two: Humans are complicated creatures. Yep, when it comes to human remains there’s nothing simple about it. Naturally in dealing with any human bone great care has to be taken and also it does tend to slow up an excavation site somewhat. Not that it’s a bad thing of course; all respect for whoever it may be is applied.

I remember having to wear latex gloves when handling human remains for this very reason, and occasionally because of the fragility of the bones. You also get a sense of the past handling them, an unusual feeling that’s hard to put into words… mystical? That’s why I prefer to stick to the animal side of osteo; less complications and an extensive variety of animals to identify. True there’s millions if not billions of species on the planet, but hey, you gotta start somewhere right?

Obviously I’m only scratching the surface on the field of osteoarchaeology, there’s a whole lot more to explore if you find it as fascinating like I do. Musing on the simplest way to attack the subject, I think I’ll start with the domesticates.

Confused already? It’s the main domesticated species of animals that are most commonly found across the UK. Since we have Wimpole Home Farm here (see, I bet you were wondering how all this was relating to the Wimpole Estate!) then I think it would be most appropriate given the types of animals seen here.

John on a foggy morning
So what am I talking about? Cows, pig and sheep (or is that goats?) are the main domesticated animals and to a lesser extent; horses. Speaking of horses we have some lovely Shire horses on the Home Farm, seven in fact, often seen in the surrounding fields. That’s not counting the forestry horse, John, who’s been hard at work extracting timber for collection (see here for more details).

The rest of these can also be seen at Wimpole; from the piggery on the farm (no not the staff room!) to the parkland in the summer with the rare breed cattle and sheep.

After that little shameless plug, I’ll get to the point. The obvious difference between these species is the size; cattle being the largest of the three, then pigs and sheep at the bottom. Of course size isn’t everything because a small cow can have similar sized bones to a large sheep! It gets even more complicated when you take into account the juveniles and all the varied breeds of each species. Not easy…or is it?

Juveniles are generally simple to separate out in that the bones are usually more porous in touch and often appearance. If you have a long bone (part of a limb; i.e. femur) then either end will likely be unfused or have a crinkled surface not unlike that of an orange (right).

How about the rest then, how to tell the difference between species? Aside from a great deal of learning and experience, the key comes down to the little morphological differences that differ between animals. To illustrate this here are pelvic girdles from two similar animals; the rabbit and the hare:


Both of these look almost identical and it’s almost like playing a game of spot the difference! There are a number of subtle differences at various aspects but the most tell-tale sign is in the socket (acetabulum) where the ball of the femur sits; as shown. Oh and by the way, colour doesn’t come into it if you were thinking of that! The elements can make a huge difference to bones not the least the colour so it kinda gets discounted, sorry.

This ends part one, with a flavour of what it’s like to analyse animal bones and this is the simple version! Just out of interest, if anyone does have any animal bones they would like me to have a look at I’m always open to having a look. Like I say when I analyse bones, I enjoy the challenge of new material so feel free to make me think!!
Seriously though if you have anything then you can get hold of me through the blog or at NT Wimpole Estate.
Medieval ridge and furrow at Wimpole Hall

Monday, 3 March 2014

Skeletons in the Closet (preview)

Yes, I'm back in blog land after a lengthy hiatus! I had planned to carry on immediately after Christmas but several things kept getting in the way. Nonetheless I'm back to continue the Wimpole experience.

Gee grandma, what small teeth you have!

As I've still got to finish writing the next post, and when I say finish I mean write a bit more than the first paragraph, I thought I'd post a little preview to let you all know what I've been up to since the festive period.

Yes I really do have skeletons in the closet too, as my wardrobe has bags of animal bones at the bottom (don't worry they're old and for archaeology so perfectly safe). Oh, by the way expect this opener in the main article too!!

Ending on a funny note though, check out youtube clip about the new NT leaked advert, very funny... at least I thought so!

Wednesday, 11 December 2013

Go Team Textiles!

Here is a public service announcement from the textiles team. Wimpole Wrapped has come to… well Wimpole and us here at team textiles want to extend this theme through to the New Year and donate a scrap of Tyvek for every curtain we personally wrap. Thank you for listening/reading.

That either put a smile on your face or wondered if I’ve hit the eggnog a bit too early! This is actually a joint collaboration between my blog and the relatively new conservation blog now set up at Wimpole. Of course as you know when I say joint collaboration I mean of course that I wrote both of them for the two blogs!


For the quick version and probably repeated text feel free to hop over to the conservation blog and to check out what else is occurring in the world of Wimpole follow the link supplied (http://wimpoleestatent.wordpress.com). I also realise upon reading through this post that there may be a bit of repetition from previous posts so I apologise in advance.

Anyway, on with the show so to speak. This week it was just Mary and I doing the textiles as Maggie had been taken ill.

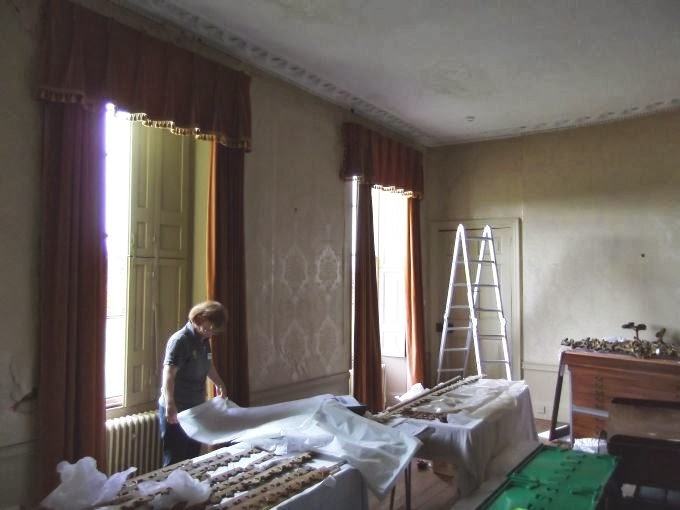
First off were the lovely curtains in the Yellow Drawing Room as seen here (left). Although we were bagging these we had to do it slightly differently due to quality and type of material involved.
The task here was to create quite tall Tyvek bags to fully protect the curtains. When the bags were in place they extended from my head height (that’s a dizzy 6 foot 2 inches, and yes it does get cold up here!) reaching down to the floor.

But let’s not get ahead of ourselves. So you think bagging a curtain sounds easy? Put it this way, I was glad Mary was able to help me as it’s definitely a two person job! Something I came to realise that afternoon when I was making more bags on my own!

Here’s a different explanation to how we create the Tyvek bags (and also to save on double typing!).
Simply put (or as simple as I can make it) we cut a length of Tyvek and fold it in half. When the bag is in place the curtain sits in this fold with the rest of the Tyvek running up the back and front of the curtain. In between the folds of the curtain we place acid-free tissue sausages to pad out the folds to prevent possible creasing of the material.

See I wasn’t kidding when I wrote about sausages! Look at those little bangers!! From tissue paper (top) to sausages (bottom). By the way, see that carpet underneath? You’ll probably be seeing more of that in a future post!

With the sausages in place the two ends of the bag are then folded round and tucked into each other to fully enclose the curtain. A specially created drawstring at the top of the bag is pulled tight (but not too tight) to secure it in place.

Here’s another photo of the bag creation process and also to give you a bit more of an insight into how long this all takes!

As you can see the ‘specially created drawstring’ is a very cleverly tied piece of thin Tyvek. Or if you prefer, Tyvek strip. Oh and just so you know the whole “Tyvek doesn’t rip or tear” is a load of rubbish! There should be a caveat that includes tearing if strip is too thin. The number of times I was struggling to tie to ends together and have the damn thing rip on me!

The folded over edge is temporary as this is lets us cut slots in the Tyvek that has the drawstring running through it. I had already cut the slots in the photo though I admit it is difficult to see them. Maybe I should have sprayed them red or something to make them stand out!

Boom. So there you go, I think that just about covers home-made Tyvek bags. I promise no more explanations, well not of the bags anyway. Look forward to next post with my ten part explanation of paper clips and their many uses!

As you can see the curtains in the Yellow Drawing room are nicely bagged up and ready for the works. Come back soon and no doubt I’ll have a post on us taking everything down again!

With the Hall being wrapped up for Christmas this year it’s been a bit too and fro with the materials. I had to borrow the only remaining roll of Tyvek from the lovely volunteers wrapping all manner of things ready for the next two weekends!
So a big thank you goes to the ladies for keeping me out of mischief and managing to carry on with the curtains!

Unfortunately Mary was preoccupied with other jobs in the afternoon so I pushed on by myself. Moving clockwise from the entrance hall, which had already been spruced up by the house staff, eventually found me in the Long Gallery (I think! If I’m wrong you’re welcome to correct me).

One thing that was noticeable bagging the curtains that afternoon was the effect of light damage on the curtain material as seen in the photo below. I know that Julia is working on a side project to monitor the light levels in each room to see how it affects materials.


It may be difficult to see from the picture but there is a stark contrast between the lighter fabric on the edge to the true red of the material itself. Hopefully the results of the light survey will highlight the problems of light in a grand Hall like Wimpole.

Finally as a throw back to Halloween, I’ve encountered an anomaly in one of my photos that I took while in the Long Gallery. Now I’m not saying I’ve captured a ghost on film because I’m always sceptical of that sort of thing (though I am open minded to all possibilities), but on the other hand it’s not something that I can readily explain.

First glance and there’s nothing glaringly obvious, it appears to be an empty room. The odd thing I noticed was the odd shape on the left of the photo. I don’t remember anything in the room that would create that sort of image, plus bear in mind it’s approximately in the middle of the room.
I should also point out that I took the shot into a mirror so the image is also a reverse of the actual Long Gallery. I have fiddled with the contrast and brightness levels to bring out the picture (it was originally black with just the white of the column) but either than that no other enhancements.

I suppose that’s what I get for trying to be arty! Ghostbusters eat your heart out!! Seriously though, any suggestions of a mundane explanation would be welcome.

And on that spooky note, until next time…

Monday, 18 November 2013

Carpets & Curtains (Part Two): It's Curtains Jim But Not As We Know it!

Hello and welcome to the second half of another day in the Hall! I should also welcome you to a room not usually seen on the tours or when you visit Wimpole. This is known as the Bow Room, called as such because it’s a large curved room that looks out on to the south avenue.

As it’s not usually part of the Hall walk through as it were, the Bow Room is unfortunately not in as good of a condition as most of the other rooms. Despite this, the curtains still need looking after and conserving where we can.
With the wiring project affecting ALL rooms in the house it makes it the ideal opportunity to care for the rooms a little better. Hence, here we are in the Bow Room lifting curtains off the floor and protecting them from the inevitable dust that will be created from the works.

I’ve been refraining on using the term ‘bagging curtains’ or ‘bag the curtains’; I don’t know why but I feel it a bit uncertain and open to ribbing! But essentially that’s what we’re doing: Bagging curtains!
Anyway, enough with the japery. On a side note, I was a little disappointed that japery is an actual word! I thought I was inventing a whole new word ready for the next addition of the English Dictionary but no such luck. Hey, read my blog and learn new words!!

Ahem, cough… enough of that. Using a roll of Tyvek (yes that magical material that doesn’t tear! – Incidentally I actually tore it today so that’s Mary’s theory out the water!). Basically we cut a length that runs down one side and up the other with eyelets cut in the edges. Tape (fabric tape not the sticky kind) is then fed through the eyelets allowing us to create a drawstring so we can pull the ‘bag’ together.

What about the two open ends, you may ask? Well, we simply fold and wrap them around to enclose the curtain in the Tyvek and tie off with some more tape. For a Blue Peter example; here’s one we made earlier (right).

This is pretty much the same method we’ve been using for all the curtains that have been tied up. Of course the type of curtain material does affect how we wrap and conserve the curtains. Some material, such as silk, creases really easily so more care has to be taken. Often we’ll create sausages to slip in between the folds to pad out the material so it doesn’t crease.
I’ve also just realised I’ve slipped into ‘textile’ language! Obviously I don’t mean your usual pork and apple; the sausages are ones we make using acid-free tissue paper. I may have mentioned these in a previous post but basically you concertina the paper up into a length or ‘sausage’ for use in packing out textiles.

When we tie up the curtains (see; much better than saying bagging curtains!), the sausages are placed where we intend to fold the curtain up so they pad the fold without too much creasing. And you have no idea how much I had to rephrase this sentence so it had a lot less innuendo in it!


Incidentally I apologise for the quality of the photos; they serve a purpose but they aren’t great. The lighting was pretty poor and the camera struggled a bit to focus up. You get the picture anyway, haha! Boom Boom!! I can see Shane groaning already…

Here's one we tied earlier...
The bagged curtains are suspended from the rails above using a simple length of tape. Speaking of simple anyone recognise what movie this is from: “Easy, just use a simple strand of creeper!” Anyhoo, after that intermission; we thread the tape through the eyelets of the bag several times for added strength and loop the top end around, through or over any support we can find up above.

Easier said than done I can tell you as nine times out of ten there is a distinct lacking of upper rail support! That’s when tieback hooks and conveniently placed picture hooks come in handy. Finally we simply tie tape around the trussed up curtains to secure the bag. This is done loosely so we don’t put extra creases in the curtain material.

So there you have it, not a bad job done! Mary’s always more than happy with the job we do, especially as she can put us in a room and say do this or do that and Maggie and I crack on with it. Ya have to blow your own trumpet sometimes!

Until next time…

Wednesday, 6 November 2013

Carpets and Curtains (Part One)


“Do you know what you want? You don't know for sure…” This about what sums up what’s going through my head at the moment, thinking how to introduce the next post! The quote is of course lyrics from one of my favourite songs ‘God Gave Us Rock n’ Roll II’ by Kiss that I happen to be listening to as I begin this post.

Ok so my taste in music is probably not for everyone and even my old roommate Al, way back during my days at uni, couldn’t stand the band but over the years I’ve come to appreciate some of their most excellent songs. FYI in case you didn’t realise it’s also the end song to one of my favourite movies!! Not telling what it is but there are clues within these first two paragraphs for you puzzlers out there.

Anyway, on to the topic (bar) of interest. Just out of interest who remembers the topic bar? Can you still get them in shops still? Or did I just make that up…By the way I’m genuinely curious, I wasn’t setting up a conundrum for all you folks! For all you Simon Pegg fans out there (Paul!), did you know he advertised Topic bars back in 2002?

And since the next track is ‘Action’, I better stop digressing and like they say in Monty Python: “Get on with it!” Right after Masterchef…
Well, I’m back! Man, I seem to be stretching this post out a bit although it was worth the break. After a very long intro, this is another house post from a week or so back. Yes, I have a backlog of blog posts now!

It was another carpet rolling Monday morning and Maggie and I were in Mrs. Bambridge’s bedroom prepping to roll a fragile rug. Eager to work we had shot off ahead, thinking that Mary would be with us momentarily. Fortunately we were quite familiar by now in the rolling of carpets and rugs so soon we got stuck in to organising ourselves and our equipment.

First job was to shift the furniture around so we could get access to the rug. Fortunately Val was nearby to give us a little direction and a hand with some of the more fragile items.

Once clear and properly rotated we could get to work covering in acid-free tissue paper and rolling on to the tube. Naturally this is easier said than done as several times during rolling we had to backtrack and shift the rug or tube slightly so it’d roll on a bit more square. Hard stuff when the rug itself wasn’t made straight!

The other thing you have to remember is that as you roll you have to smooth the tissue paper in front to remove as many little creases and bumps as possible. Reason for this is that any crease or fold can affect the material of the rug or carpet when it’s rolled up on a tube, which can lead to degradation.

Being a thinner rug than the carpets we had rolled previously, made it easier to ruck up as we were rolling. Quite a few times we had to stop and even out the rug underneath before we could continue.

Eventually though we had it tightly rolled up on to the tube ready for the next stage: Tyvek.
As with previous, the whole bundle is wrapped again in Tyvek, that magical material that protects but doesn’t tear. It’s quite nifty stuff, much better than the cursed tissue paper that refuses to cut and tears at the slightest pull!
Val was still on hand to give us a hand (as seen in the photo opposite) and lift the package away from the public. Where was I you may ask? I was doing the important job of documenting the entire procedure for prosperity!

Only kidding, I was actually manoeuvring the odd bit of furniture to make it easier for the two girls to get the rug out of the way. I’m often diving around trying to take the odd snap while hard at work at the same time.

Final job was putting everything back where it came from! Feeling a little guilty for stopping Val from doing her usual jobs we tackled putting most things back ourselves, although now I think about it I think Val was there anyway!

I also have a greater appreciation for those little barriers that are put up to stop the punters wandering all over the place. I had no idea how tricky they are to get right (that’s the barriers by the way not the public!); you put one up and as you’re adjusting it the one before falls over! It took longer than necessary to finally get the room properly barriered off, phew!

Now where are those curtains…